
Introduction
If you're getting started with ClickUp in 2025, you've come to the right place. ClickUp stands out because it consolidates multiple business tools into one platform. Instead of juggling separate applications for project management, team communication, document storage, time tracking, and reporting, ClickUp provides solutions for all these needs. This complete guide will walk you through everything you need to know to set up, customize, and master ClickUp.
If you prefer, you might want to check out our YouTube video to get started with ClickUp!
Key Takeaways
- Simplify your workflow with ClickUp’s all-in-one platform.
- Set up your homepage with a minimalist approach for focused work.
- Utilize essential tools like Inbox, Docs, Dashboards, and Timesheets effectively.
- Customize notifications to avoid unnecessary distractions.
- Understand and master ClickUp’s hierarchy for better task organization.
- Leverage collaboration tools like Chat, comments, and Docs for seamless team communication.
- Explore views, dashboards, and reports to monitor progress and enhance performance.
Understanding the ClickUp Interface
Home Page Setup for Focused Work
When you open ClickUp, the homepage is your starting point. Keep it simple. Avoid overcrowding it with widgets and focus on three main cards:
- My Work shows all tasks assigned to you, sorted by due date.
- Assigned Comments displays the messages and comments where someone tagged you.
- Recents lists the items you recently viewed or edited.
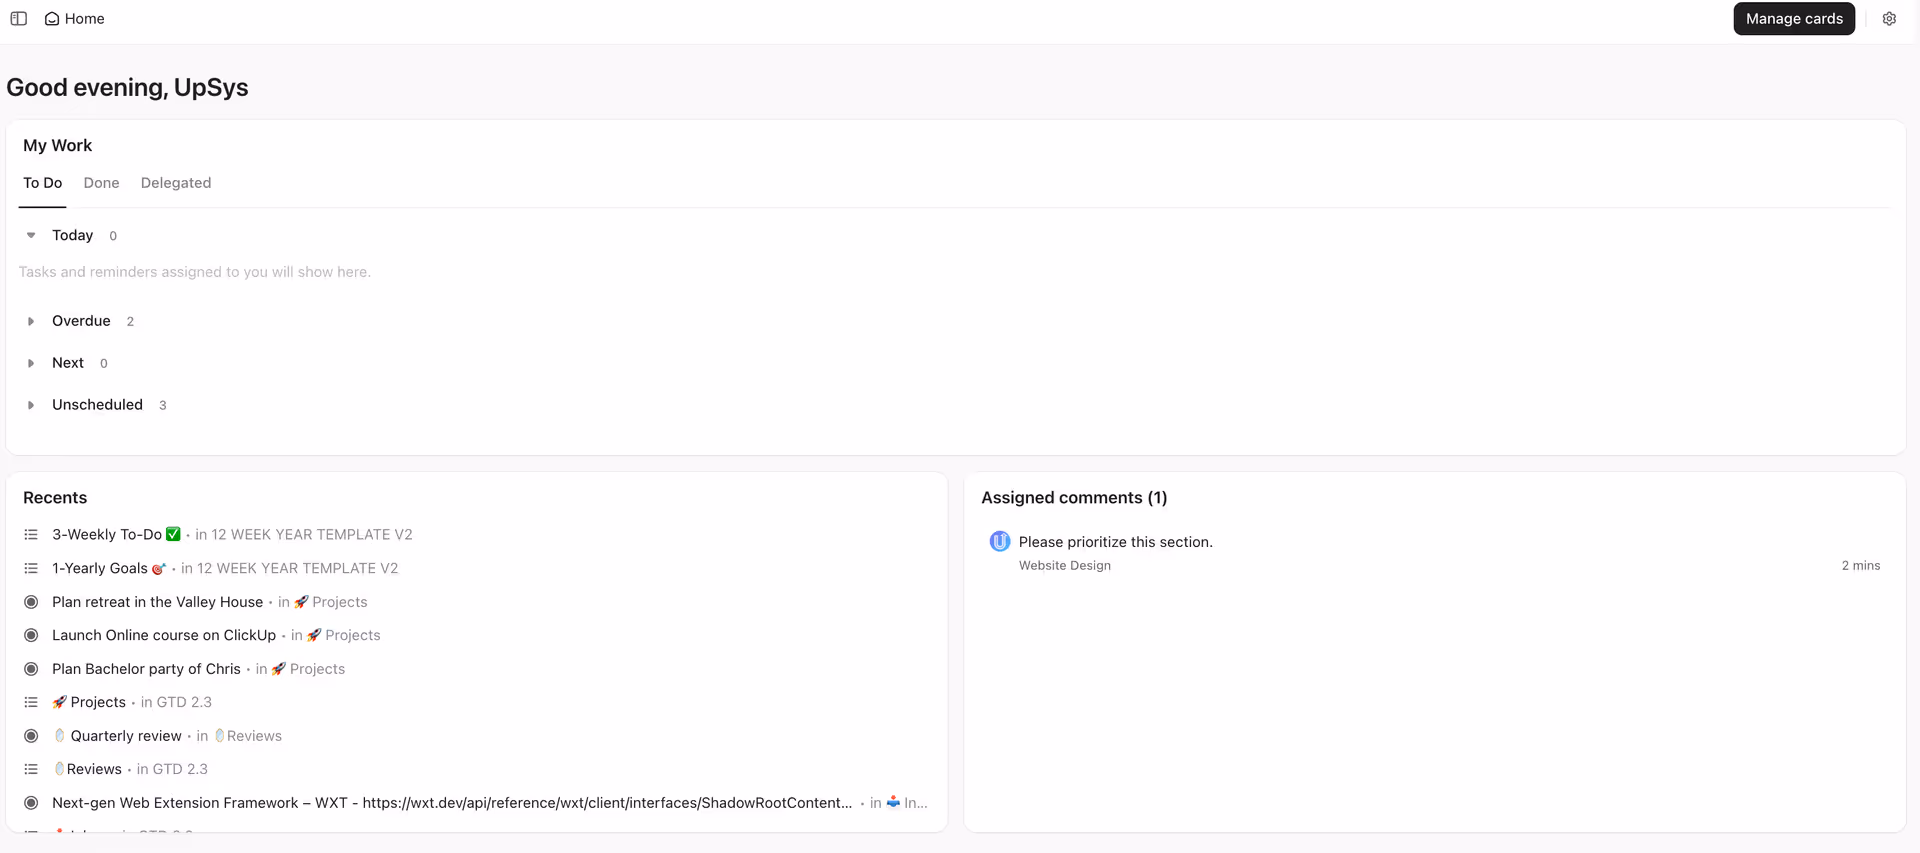
Main cards to use in homepage
You can adjust these cards by clicking Manage Cards and selecting only those three. Limiting the view helps you focus on what matters most each day without distractions. For new users, this minimalist setup prevents information overload. It ensures that the homepage reflects your active work.
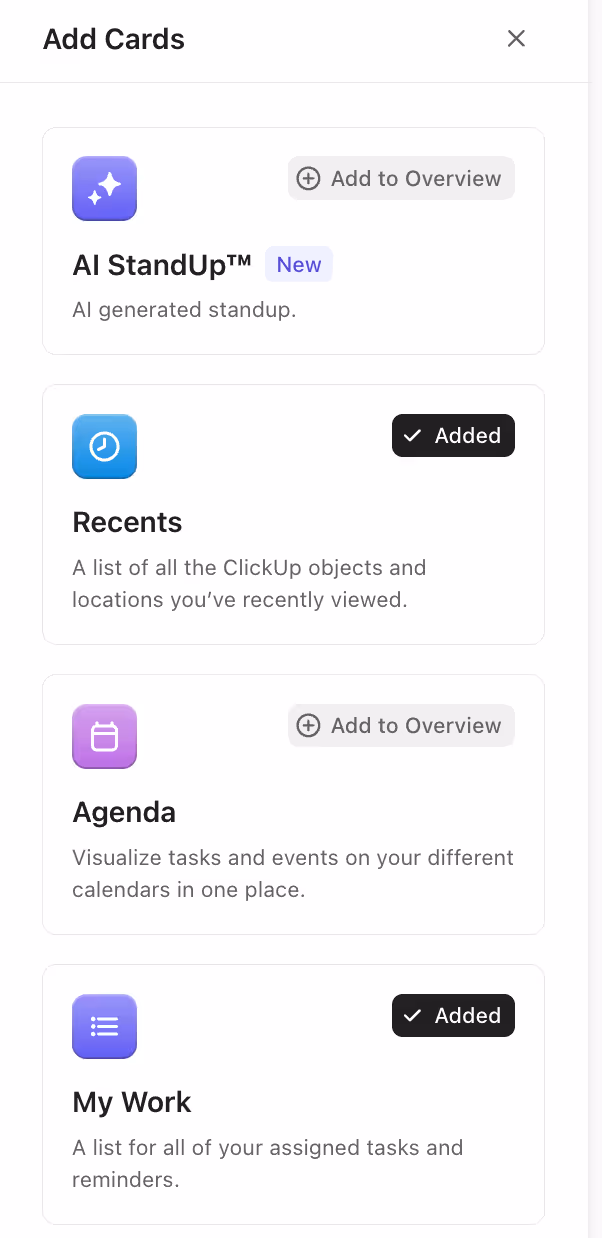
Manage Cards
Essential Hubs You’ll Use Daily
ClickUp centralizes multiple tools under one interface. Understanding each hub will help you use the platform efficiently.
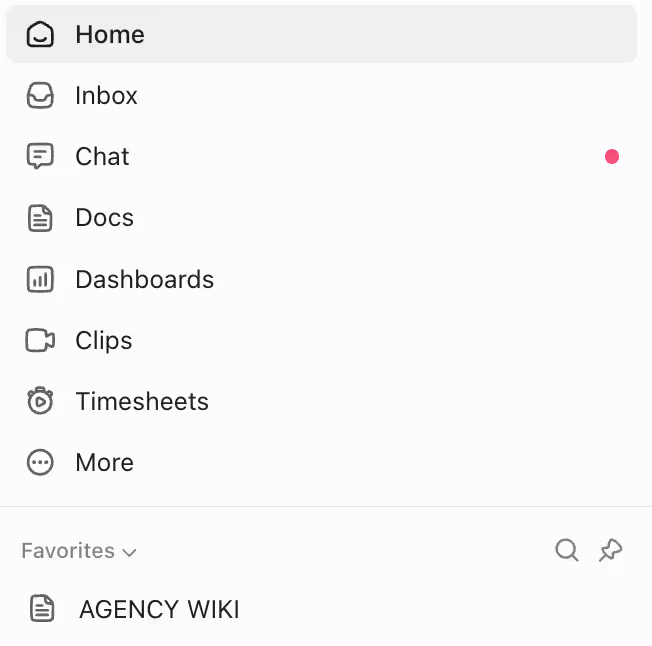
Sidebar Navigation
- Inbox – Shows all recent updates, mentions, and assigned comments.
- Chat – Enables direct messaging or group channels related to projects. It can replace Slack or Teams for smaller teams.
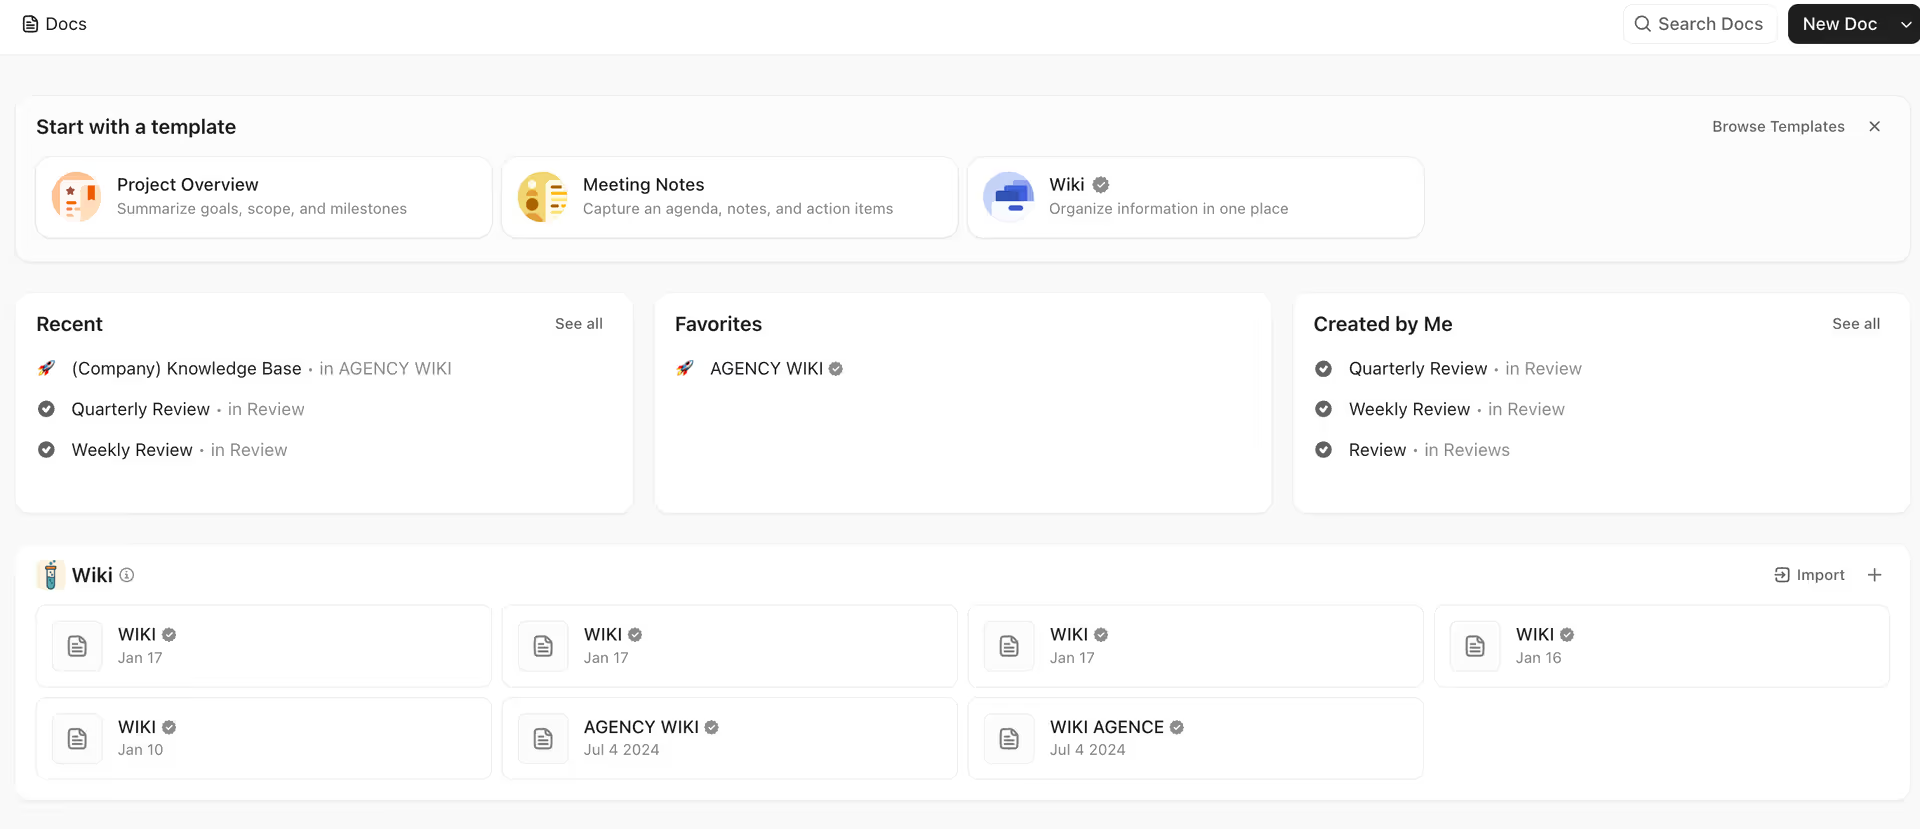
- Docs – A built-in editor for internal wikis, SOPs, and client documentation. You can format text, add images, and create nested pages.
- Dashboards – Visualize progress using charts and task reports. You can track project completion, workload balance, and performance metrics.
- Clips – Lets you record screen videos with automatic transcripts.
- Timesheets – Displays how much time each team member logged per week.
- Favorites – Stores your most visited lists, documents, or dashboards for one-click access.
The Power of the Search Bar
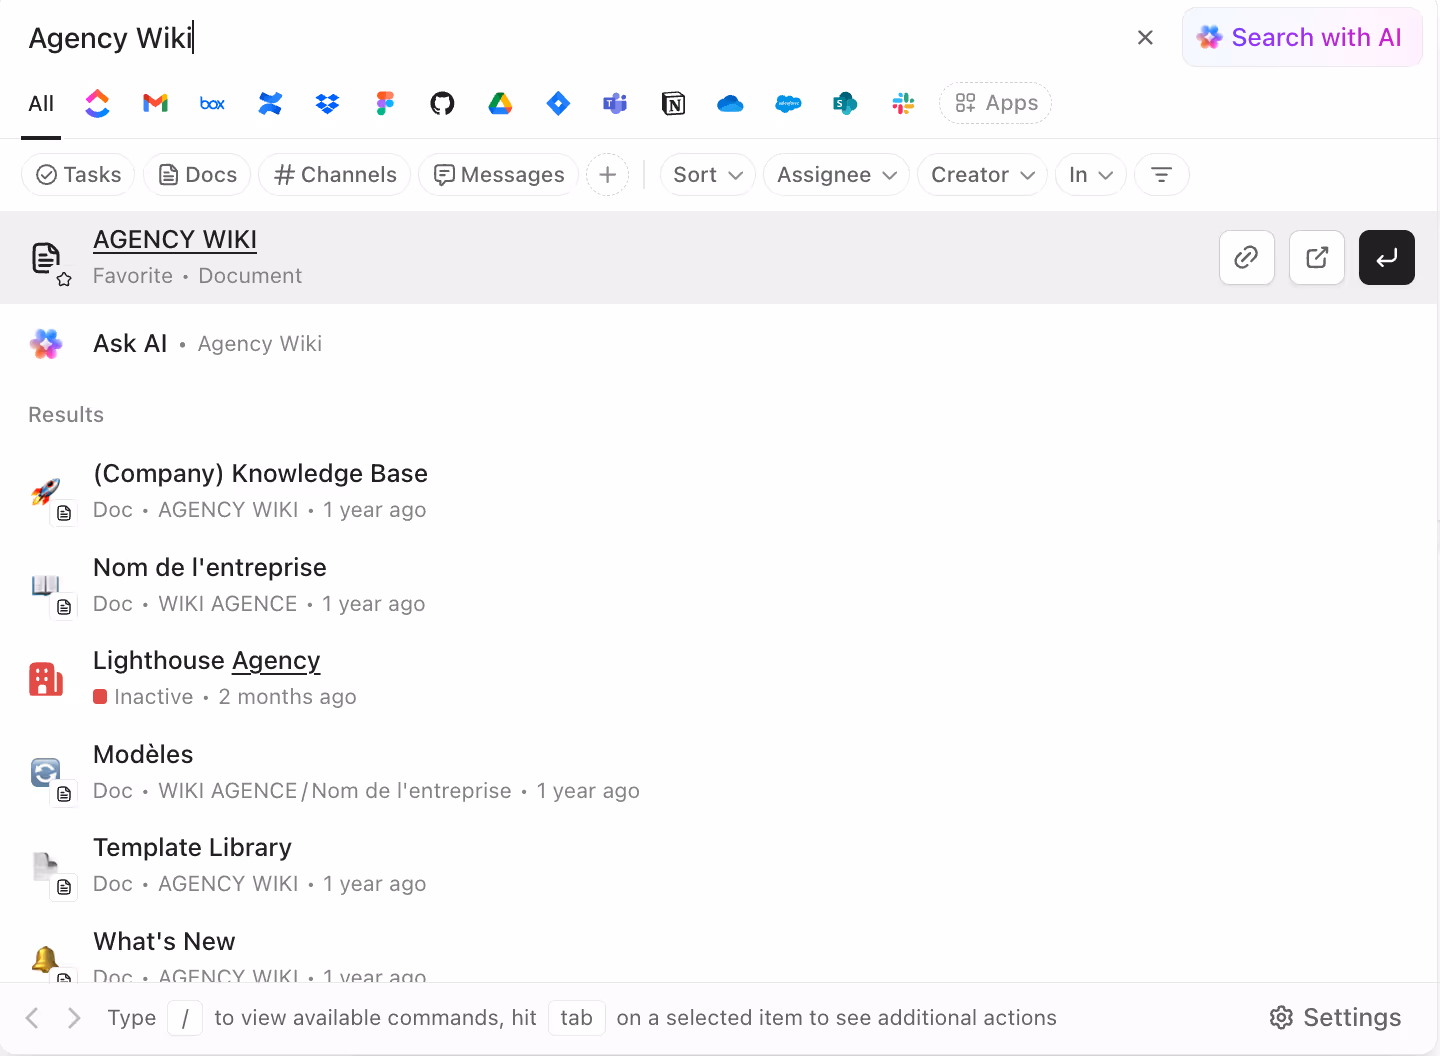
ClickUp Global Search
ClickUp’s global search function is one of its most valuable tools. Press Cmd + K (Mac) or Ctrl + K (Windows) to open the search window instantly. Instead of clicking through spaces and folders, simply type a keyword or task name and ClickUp will take you directly to that item’s location. As your workspace grows, this habit saves significant time. Even experienced users rely on search far more than navigating the hierarchy manually.
Setting Up Notifications the Right Way
By default, ClickUp sends too many notifications. Every status change, comment, and mention can trigger alerts. To avoid that, you need to customize notification rules before adding your team. For a full walkthrough on notification best practices, see Full Guide to Setting Up ClickUp Notifications.
Recommended Notification Settings
- Click your profile avatar in the upper right corner.
- Select Notification Settings.
Accessing Notification Settings
- Turn on Auto-watch tasks I’m involved in.
- Set When I comment on a task or subtask only so you receive replies to threads you start.
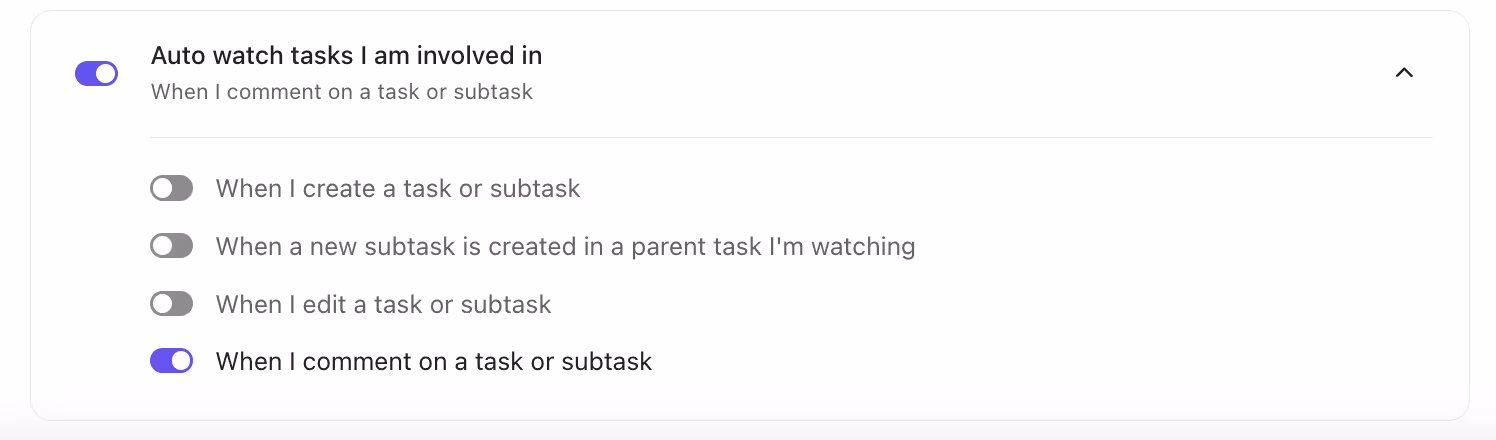
Auto Watch Task
- Adjust Smart notifications to 3–6 hours to prevent duplicate alerts while you’re working.
- Under Email, keep Mentions only active.
- Disable Browser and Mobile push notifications unless absolutely necessary.
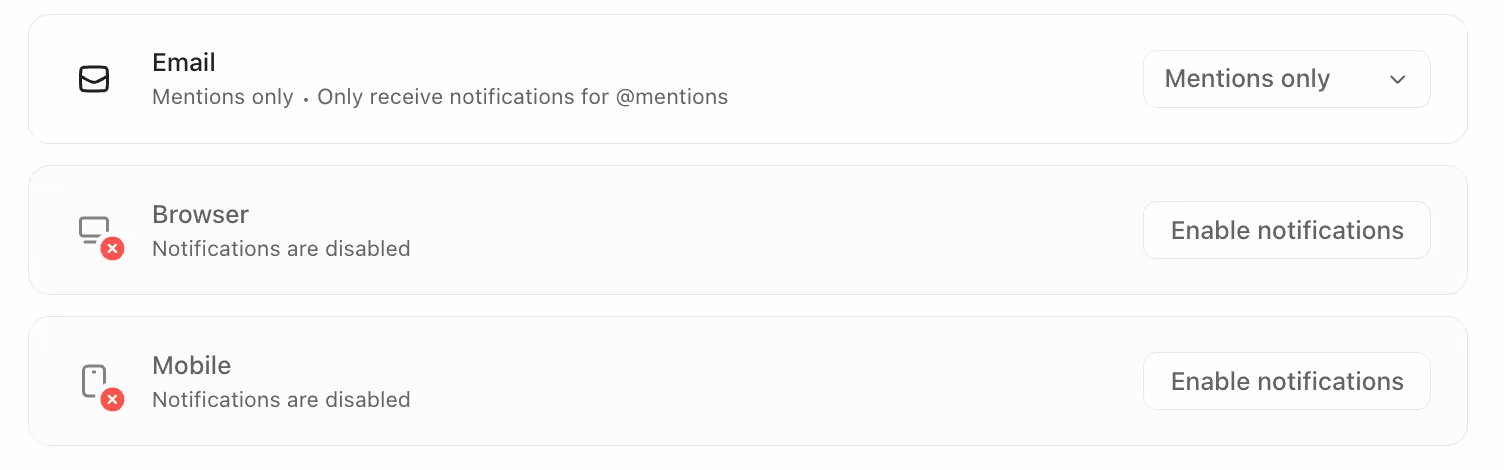
Notification setting for different channels
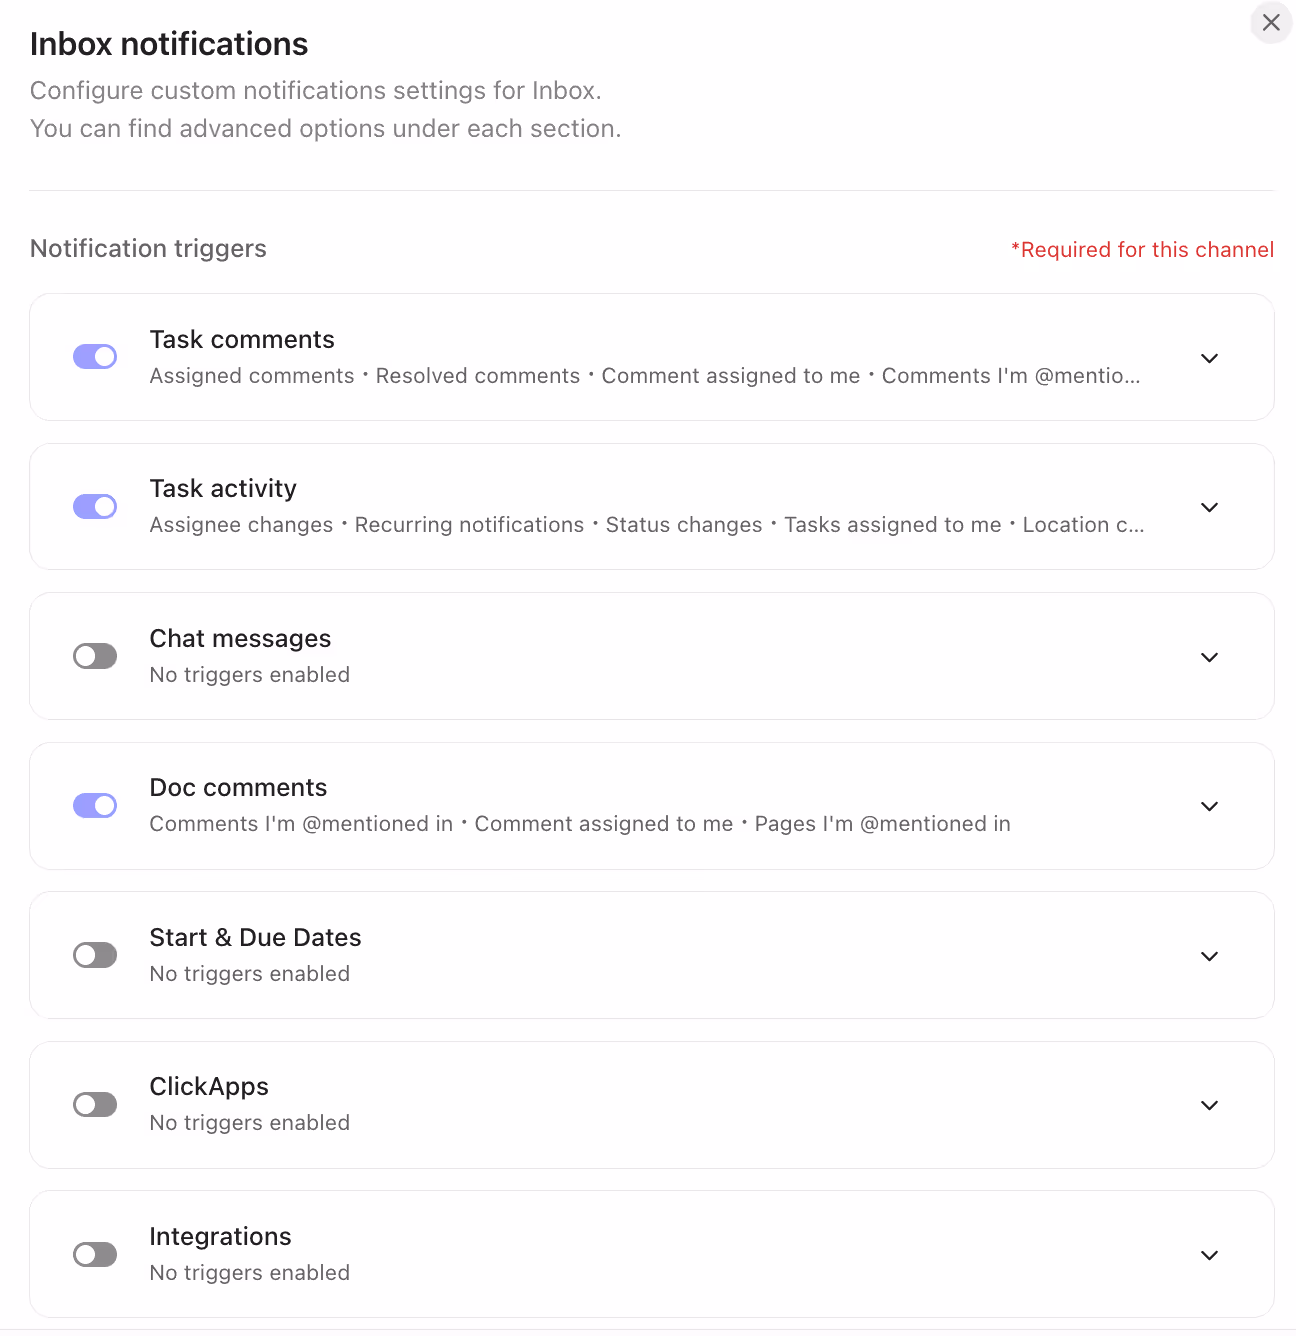
Keeping Inbox Under Control
Inside Inbox Settings, choose Custom and turn off all optional toggles except:
- Task Comments
- Task Activity (Status Changes, Assigned Tasks)
- Doc Comments
Inbox Settings
The ClickUp Hierarchy Explained
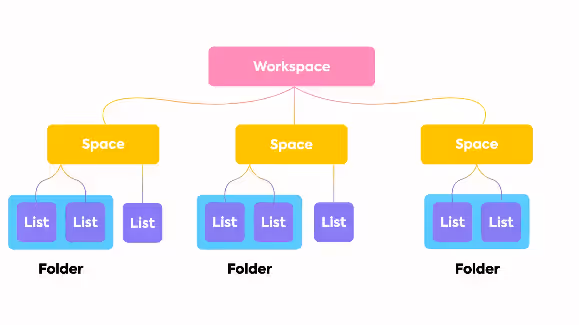
ClickUp's organizational structure is fundamental to everything you'll do in the platform. Understanding it early prevents confusion later when permissions, fields, or views behave differently than expected. Here is how the hierarchy works:
ClickUp Hierarchy
Let's break this down:
- Workspace: This is the top-level container for your entire organization. For instance, your workspace is the "Agency HQ".
- Spaces: These could represent different departments, clients, or major project categories. For instance, you might have a Space for "Marketing" and another for "Operations"
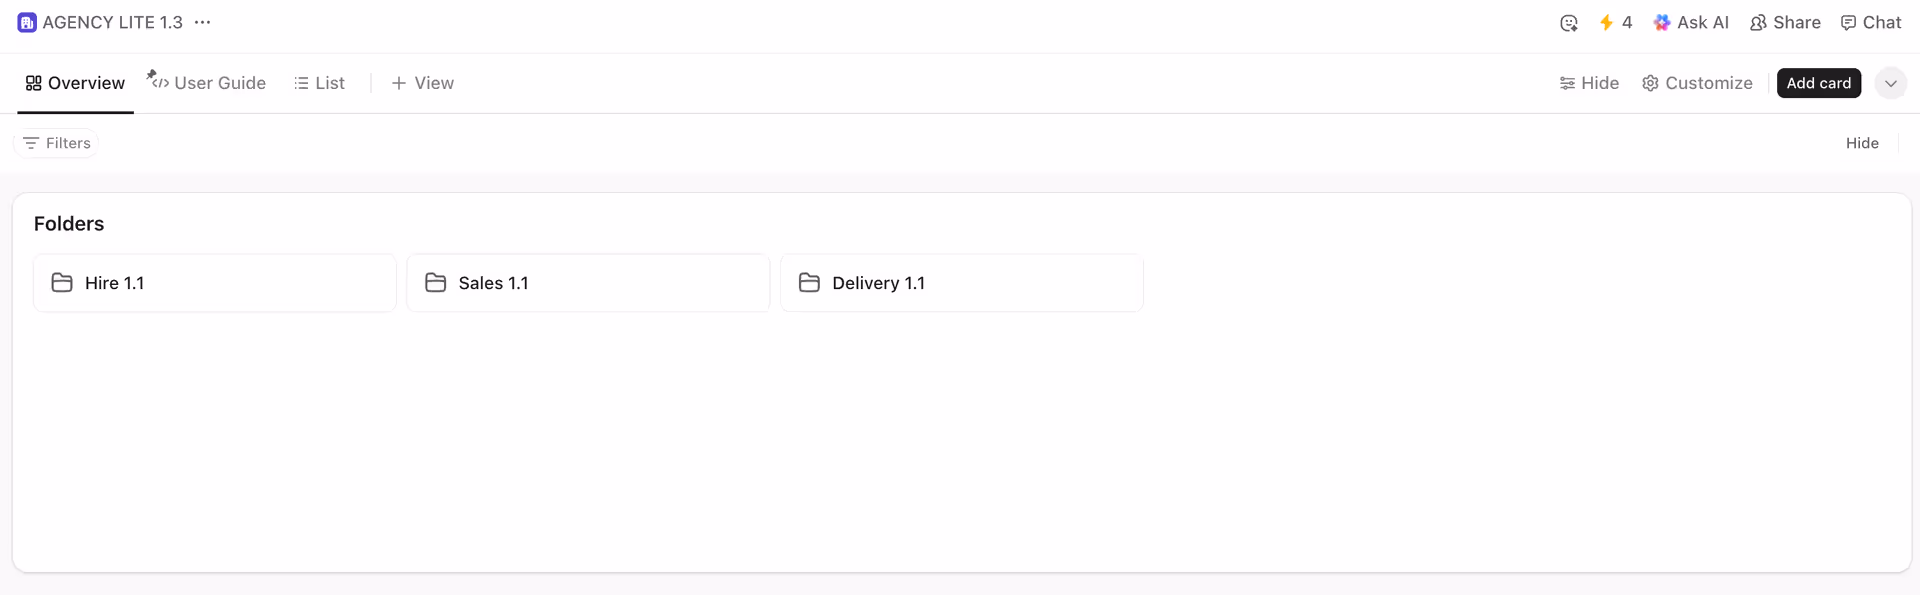
- Folders: Within each Space, you can create folders to group related lists under a space. In your "Marketing" Space, you might have “Social Media Campaigns” or “Email Marketing Campaign”
- Lists: These hold the actual tasks. For example, within the "Social Media Campaigns" folder, you might have a list for "Q4 Instagram Strategy" or "Holiday Promotions Plan."
- Task & Subtask: The actionable work items. Tasks represent the main deliverables, while subtasks break them down into smaller and manageable steps. For example, a task like "Launch Q4 Instagram Strategy" might include subtasks such as "Design graphics," "Write captions," and "Schedule posts."
Each level can have its own statuses, permissions, and custom fields. A common mistake is creating custom fields or statuses at the wrong level which leads to visibility problems. If you give someone access at the space level, they can see everything under it. If you want them to see only one client or project, restrict access at the folder or list level.
Building Your First ClickUp Space
Creating a New Space
To create a new space:
- Click the plus icon in the sidebar.
- Select New Space and give it a descriptive name.
- Example: “Delivery” for client projects.
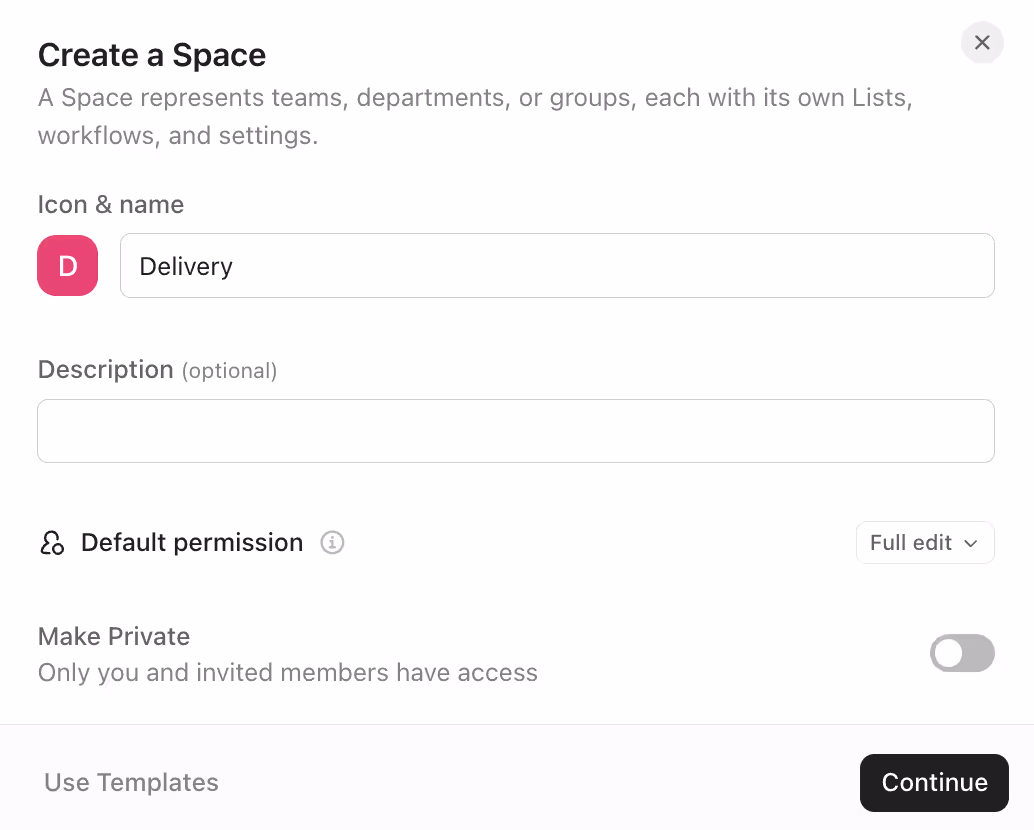
Creating a new space
- Keep the default List View and disable extra views like Board for now.
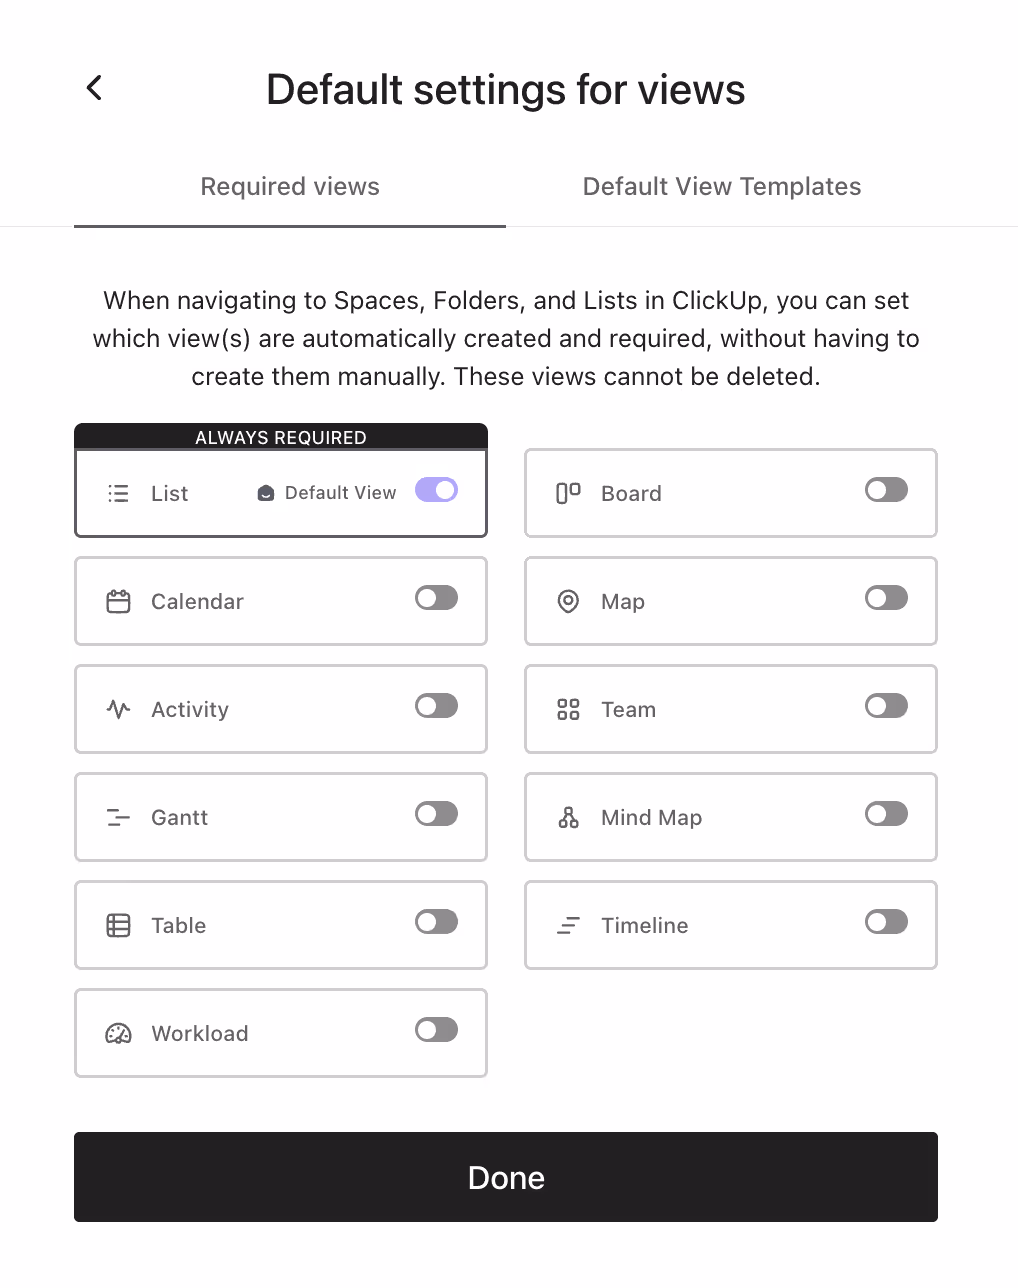
Default settings for views
- Click Done to create it.
Setting Workflows and Statuses
Statuses represent your process stages. Choose labels that match your work rather than using ClickUp’s defaults.
Examples:
- For delivery teams: To Do → In Progress → Review → Validated → Done
- For sales teams: New Lead → Contacted → Proposal Sent → Won → Lost
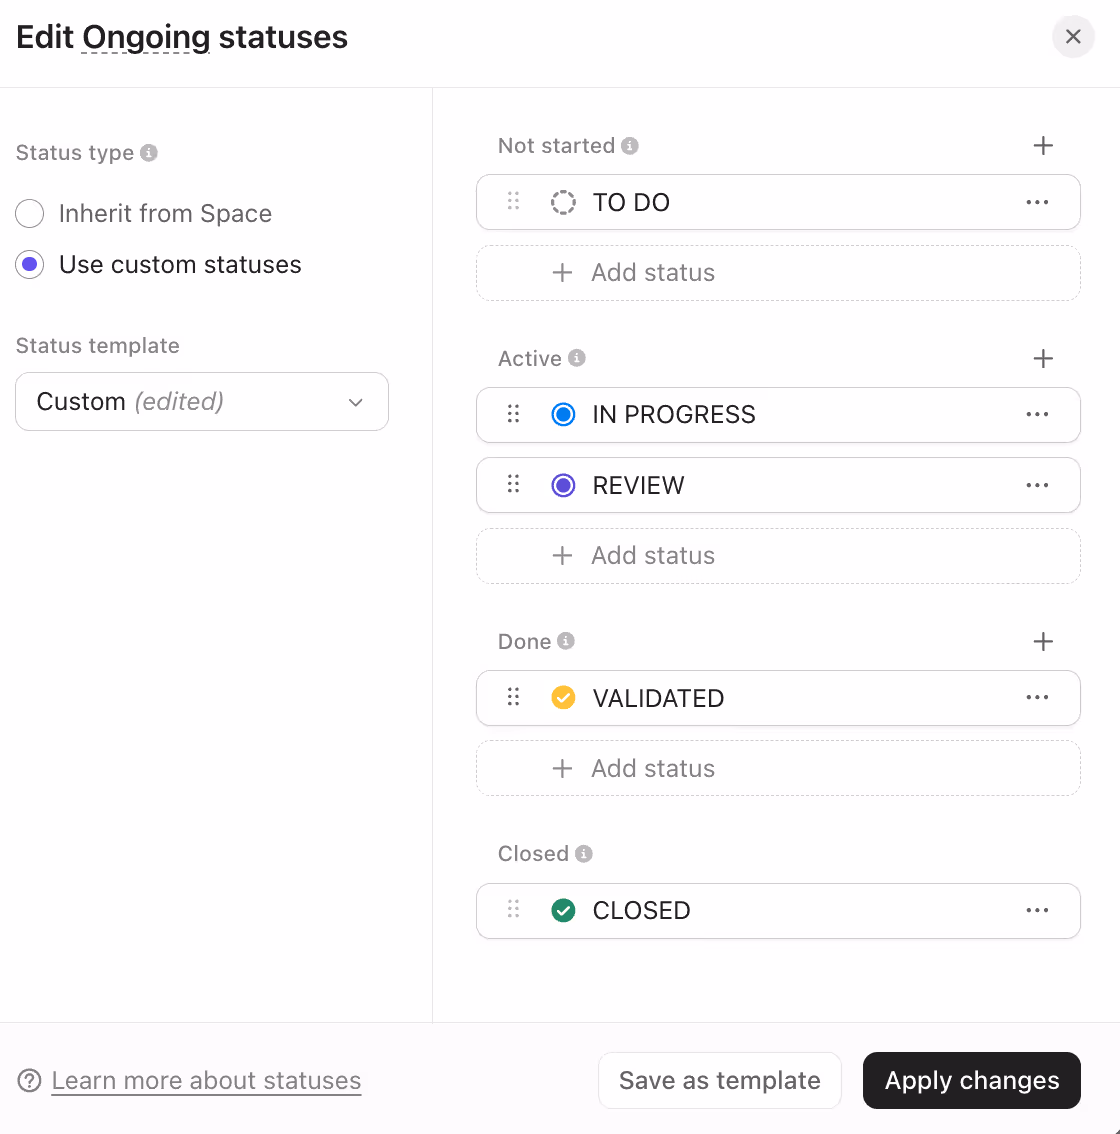
Setting up statuses
To apply them:
- Open the space settings.
- Select Statuses.
- Customize the names and colors.
- Apply changes to all lists within the space.
Enabling the Right ClickApps
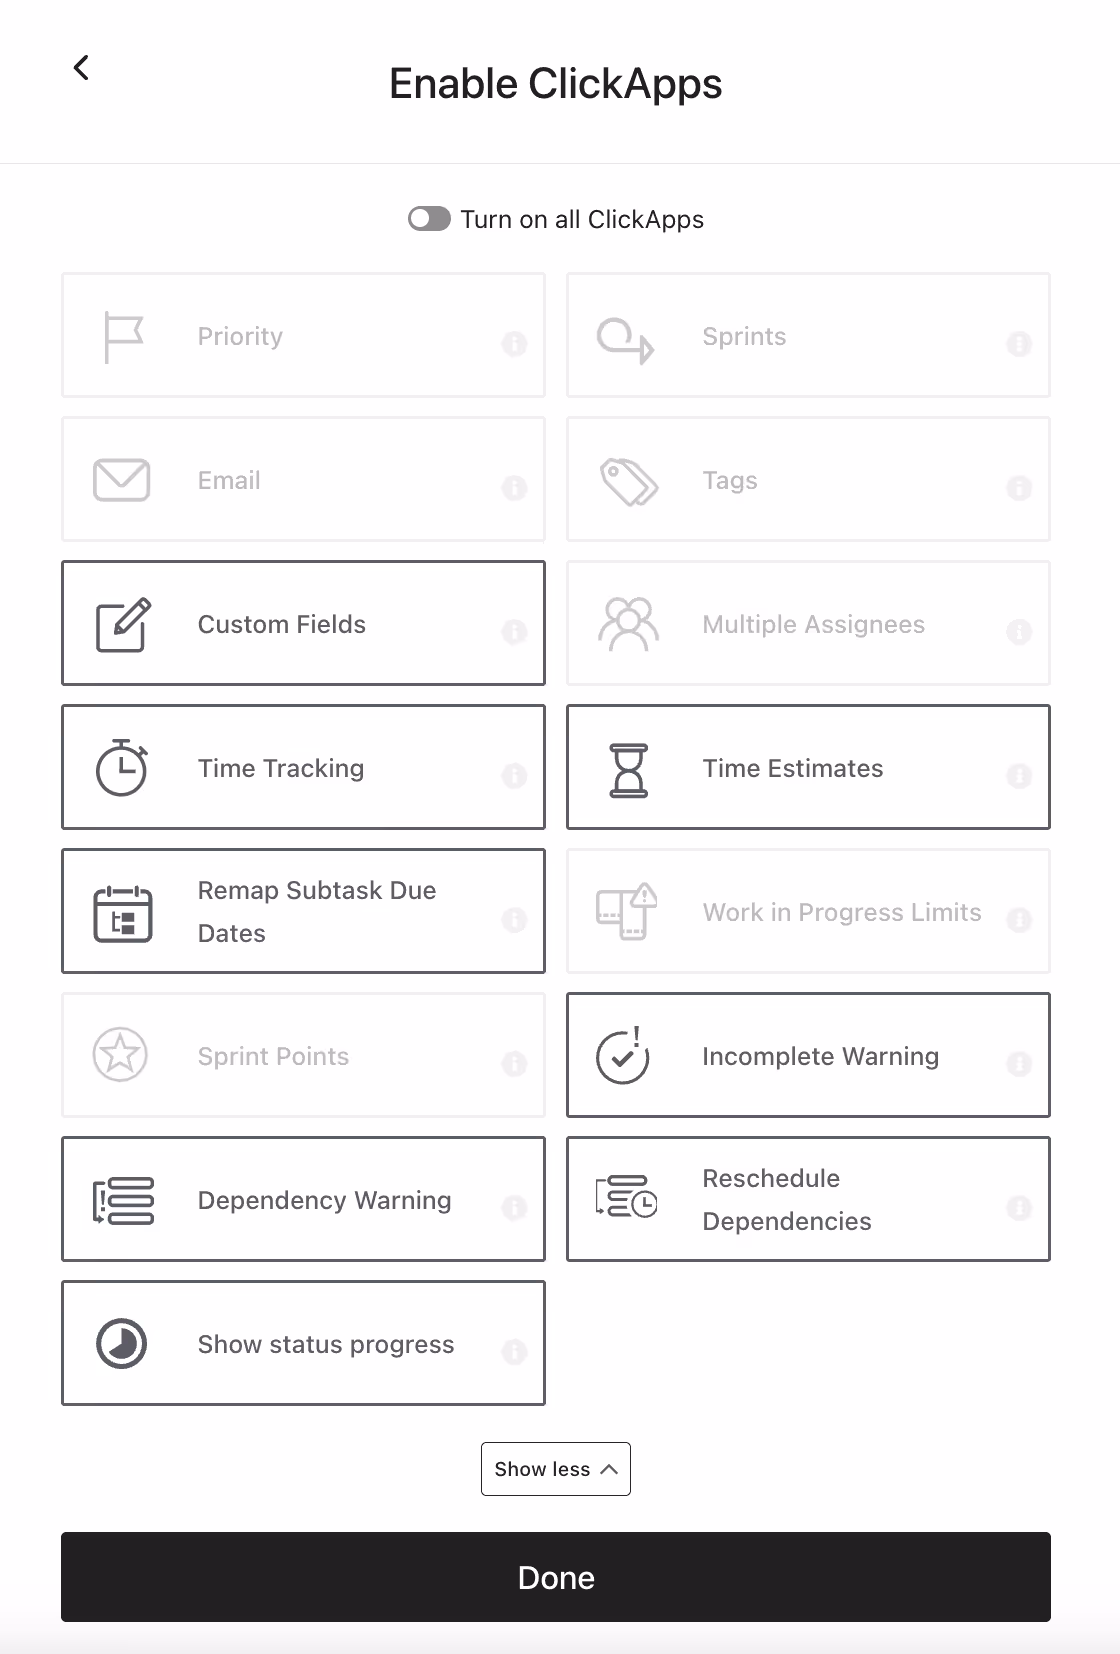
Choosing the right ClickApps
ClickApps control which features are available inside a space. Too many active ClickApps make ClickUp feel heavy. Disable the extras until your team needs them.
Keep enabled the following:
- Custom Fields - Add extra data to tasks, like budgets, URLs, or client names, to keep everything organized.
- Time Tracking - Track how much time is spent on tasks for better planning or billing.
- Time Estimates - Set expected time durations for tasks to manage workloads effectively.
- Remap Subtask Due Dates - Automatically adjust subtask deadlines when the main task's due date changes.
- Incomplete Warning - Get alerts if tasks or subtasks are left unfinished before a deadline.
- Dependency Warning - Receive notifications when a task can't start because a related task isn’t done.
- Reschedule Dependencies - Shift dependent task dates automatically when the main task's schedule changes.
- Show Status Progress - Visualize how far along tasks are in their workflow stages.
Organizing Tasks
Anatomy of a ClickUp Task
Tasks are the building blocks of ClickUp. Every project, request, or deliverable starts as a task within a list. Here's a breakdown of a ClickUp task's key components:
- Task Name: Keep it clear and concise for easy understanding.
- Description: Use this area to provide detailed information, instructions, or context for the task.
- Assignee: Designate who's responsible for completing the task.
- Due Date: Set deadlines or recurring to keep projects on track.
- Priority: Indicate the task's importance with customizable priority levels.
- Status: Track the task's progress through customizable status options.
- Time Estimate: Add estimated completion times for better resource management.
- Custom Fields: Create additional fields to capture project-specific information.
- Subtasks: Break down complex tasks into manageable steps.
- Attachments: Add relevant files directly to the task for easy access.

Anatomy of a ClickUp task
Creating Tasks and Subtasks
1, Open a list and click + Task. See all the ways to create tasks in 10 Ways to create Tasks in ClickUp You Need to Try!

Creating a new task
2, Give it a clear name, such as Set Up Branding Campaign.
3, Assign it to a team member and set a due date.
- If the task involves several smaller steps, create subtasks. Each subtask can have its own due date and assignee.
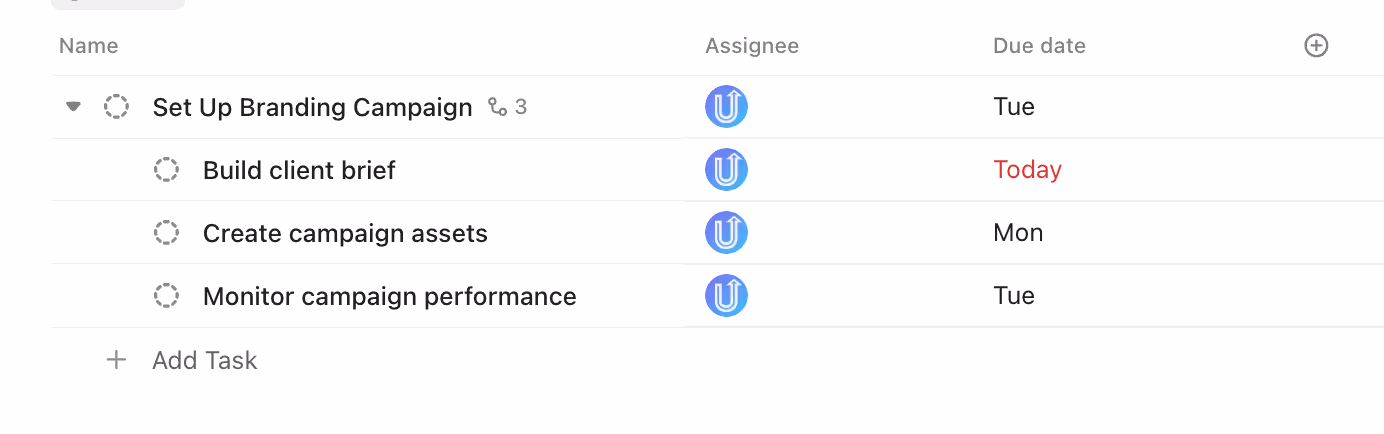
Task with subtasks
Subtasks vs Checklists
Subtasks and checklists serve different purposes. Choose subtasks when you need:
- Individual assignees for each item
- Separate due dates and time tracking
- Detailed descriptions or attachments
- Progress tracking and reporting
- Comments and collaboration on specific items
Meanwhile, choose checklists when you need:
- Simple step-by-step processes
- Quick completion tracking
- Minimal additional information
- Personal task breakdown (all items for same person)
Using Custom Fields for Tracking
Custom fields let you store project-specific data like URLs, budgets, or client names. To create one:
- Click Add Custom Field in your list view.
- Choose a type (text, dropdown, number, or URL).
- Label it clearly, such as “Client Website” or “Budget.”
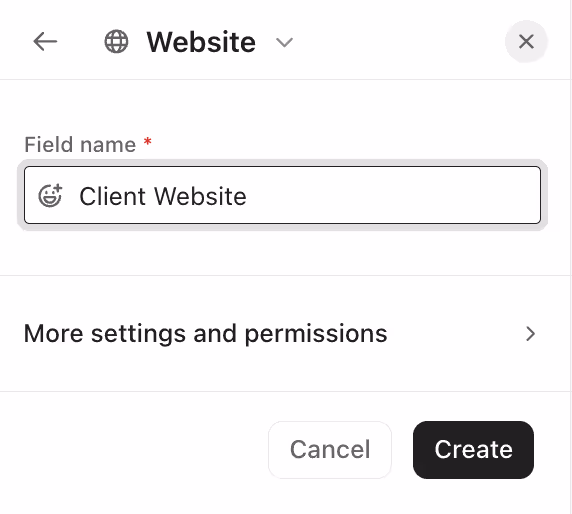
Adding custom fields
Tip: Reuse existing fields whenever possible to maintain consistency across spaces. Before creating a new one, check if it already exists in your workspace. Duplicate fields can make reporting more complicated later.
Collaboration and Communication Tools
ClickUp’s strength lies in centralizing team communication inside tasks. Instead of jumping between tools, everything happens in one workspace.
ClickUp Chat
ClickUp’s Chat feature enables real-time communication with your team. You can create group channels for projects or departments, or send direct messages to individuals.
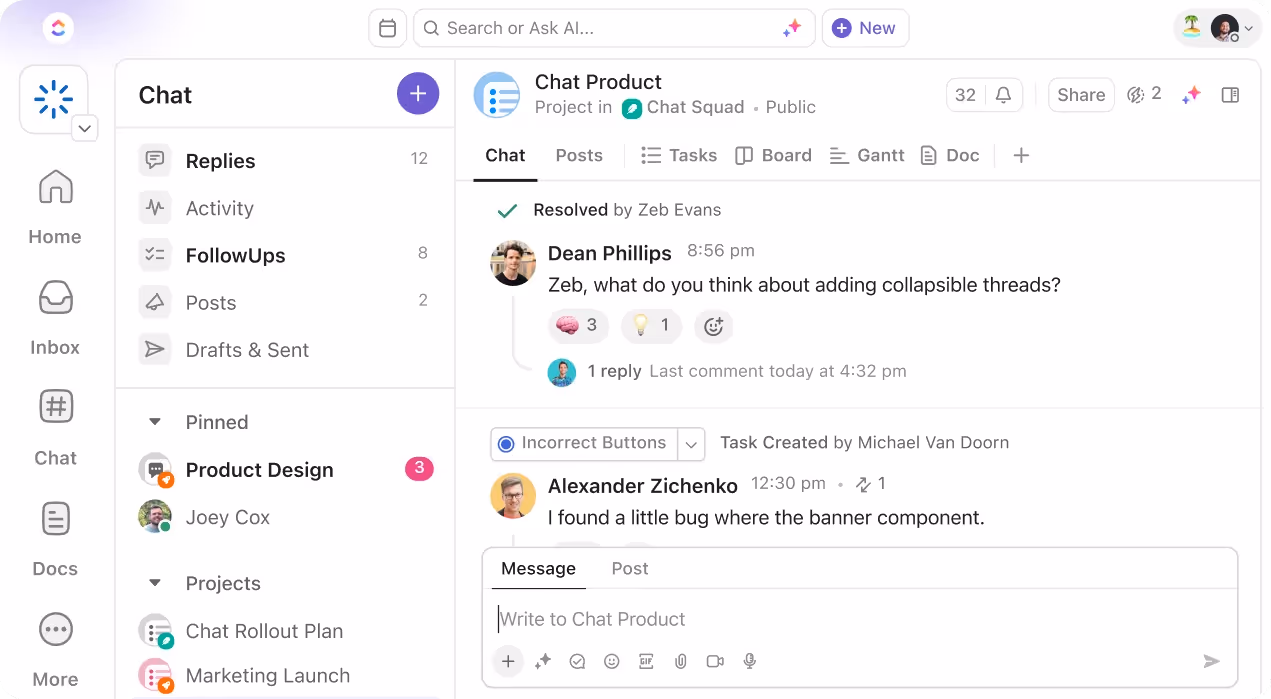
ClickUp Chat
- Use channels to centralize discussions around specific topics or projects.
- Share files, links, and updates directly within the chat.
- Integrate chat discussions with tasks by linking messages to relevant items.
Comments and Mentions for Team Interaction
Each task includes a comment section where teammates can discuss progress, share updates, or ask for clarification.
Use the @mention feature to tag someone directly. For instance, typing @Alex sends a notification to Alex, ensuring that person sees the message.

Using the @mention feature
To turn a comment into a to-do, click Assign Comment. The assigned teammate will see it in their “Assigned Comments” on the homepage until they mark it resolved. This method replaces back-and-forth email reminders.
Using Docs for Real-Time Collaboration
Docs hub
ClickUp Docs lets you write and store documentation directly inside ClickUp. You can draft meeting notes, create internal process guides and write project briefs.
Docs support headings, images, callout boxes, and embedded links. They are ideal for replacing external tools like Google Docs. Each page can be linked to tasks or lists that keeps all resources in one connected workspace.
Mastering ClickUp Views
List View
The List View is a straightforward yet powerful way to manage your tasks. Here's how to make the most of it:
- Customization: Tailor your List View by adding or removing columns to display the information most relevant to your workflow.
- Grouping and Sorting: Use the grouping feature to organize tasks by status, assignee, or any custom field. Sort tasks to prioritize your work effectively.
- Filters: Create and save filters to quickly access specific sets of tasks, such as "My urgent tasks" or "Overdue client deliverables."
- Bulk Actions: Save time by performing actions on multiple tasks at once, such as changing status or assignee.
Remember, the List View is highly customizable. Don't be afraid to experiment with different layouts and settings to find what works best for you and your team.
List views
Board, Calendar, and Gantt Views
While the List View is versatile, ClickUp offers other views to cater to different project management needs:
- Board View: Perfect for visual thinkers and teams using Kanban methodologies. Drag and drop tasks between columns to update their status easily.
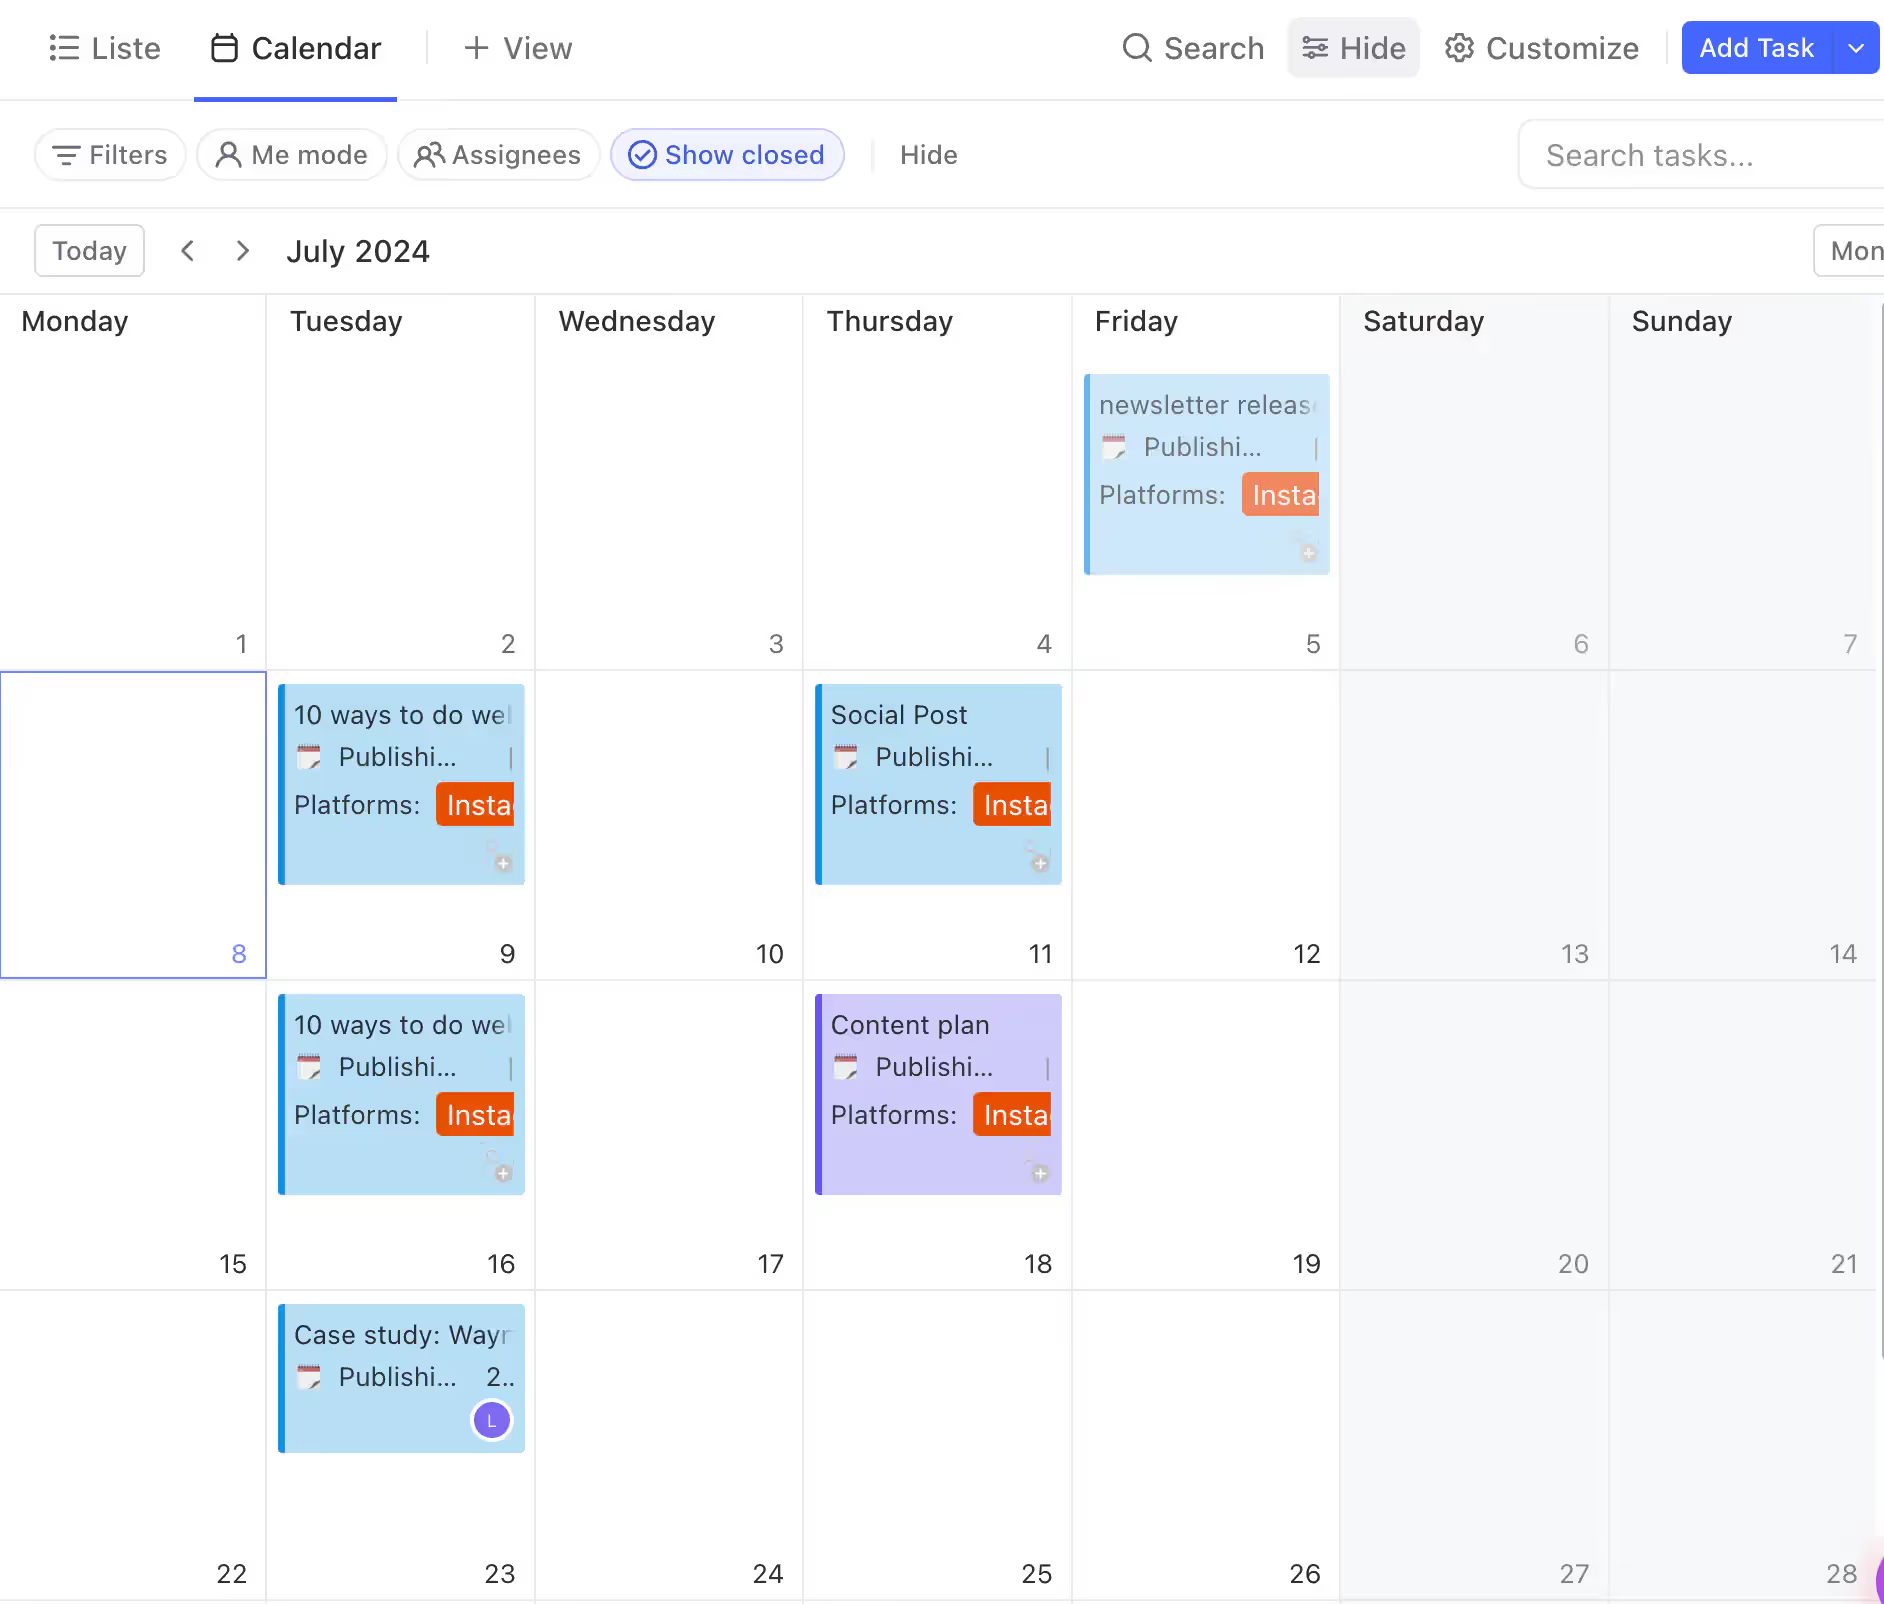
- Calendar View: Ideal for time-sensitive projects and deadline management. Visualize your tasks on a calendar to ensure balanced workloads and timely completion.
- Gantt View: Essential for complex projects with dependencies. Use the Gantt chart to visualize project timelines, set dependencies between tasks, and identify critical paths.
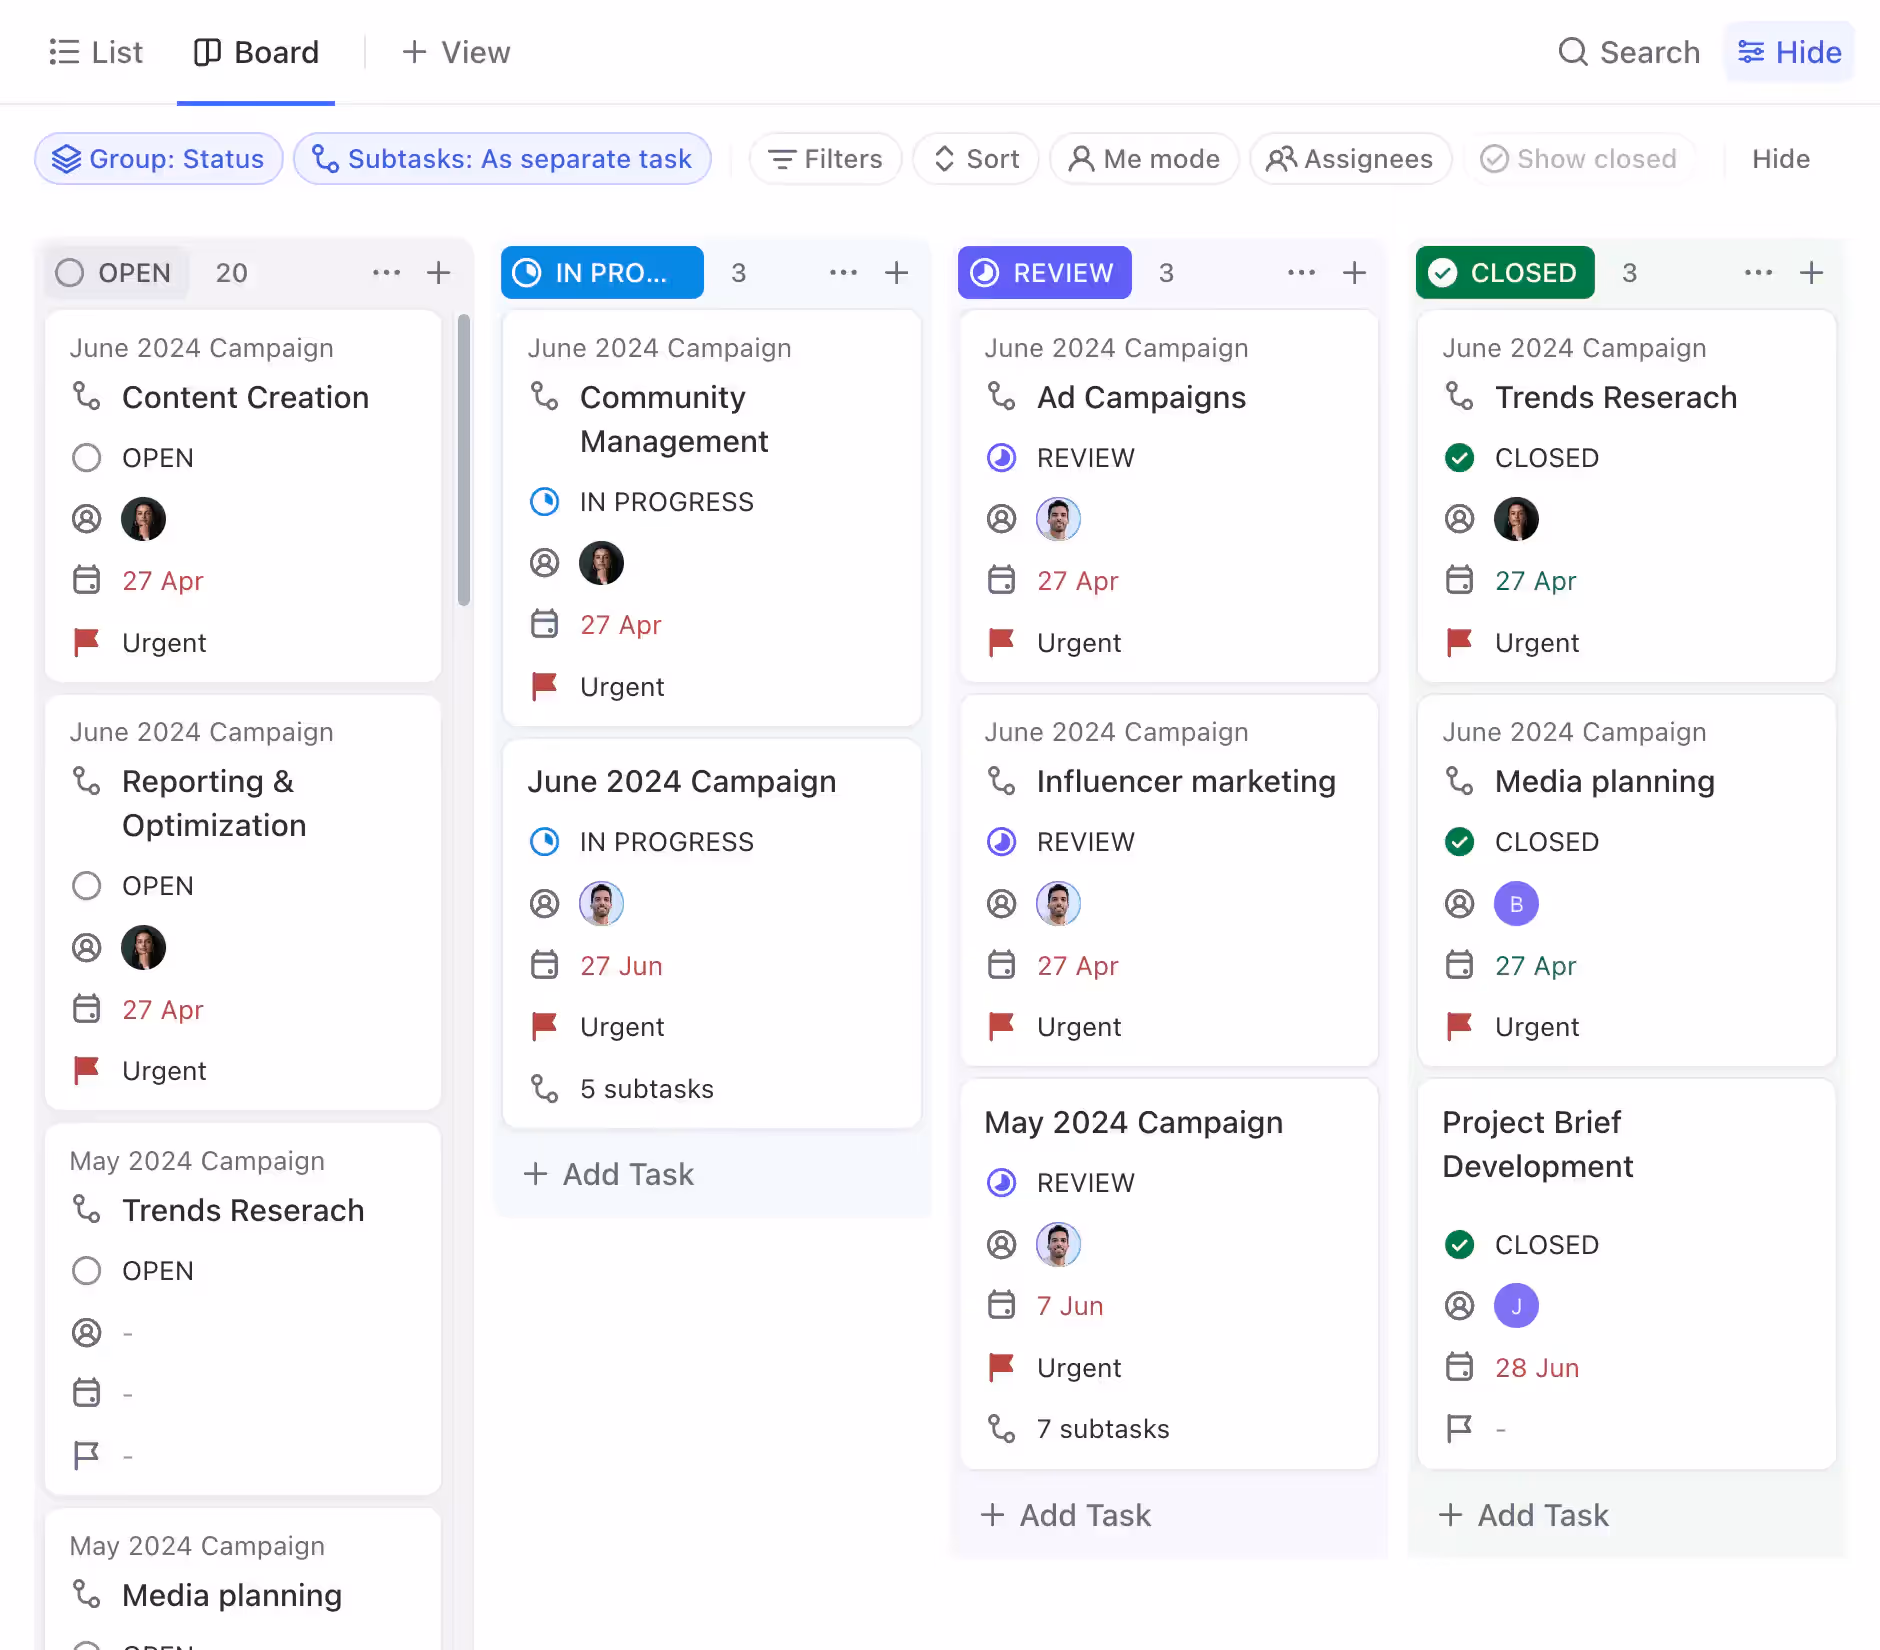
Board view in ClickUp
Each view offers unique benefits:
- Board View excels at showing workflow progression.
- Calendar View is unbeatable for scheduling and time management.
- Gantt View shines in illustrating project timelines and task relationships.
Pro Tip: Don't limit yourself to one view. Switch between views as needed to gain different perspectives on your projects and tasks.

Calendar view in ClickUp
Customizing views
You can customize visible columns, sorting, grouping, filtering etc. within each view. For best practices:
- Name saved views clearly based on their specific configuration.
- Delete unused views to reduce clutter.
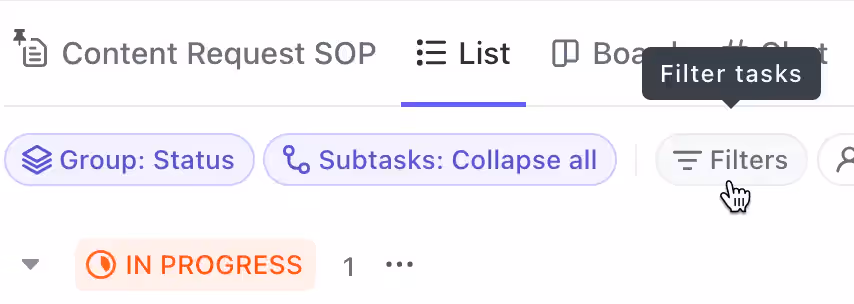
Use filters in ClickUp
For a deep dive on the various ClickUp views, check it here.
Dashboards and Reporting
Overview vs. Dashboards
ClickUp offers two main reporting options: Overview and Dashboards.
- Overview sits within each space. It gives a quick summary of project health using small cards. You can display charts showing completed tasks, workload balance, or tasks by assignee.
Overview in Space
- Dashboards are stand-alone pages for deeper reporting. They include widgets like charts, progress bars, and time tracking visuals.
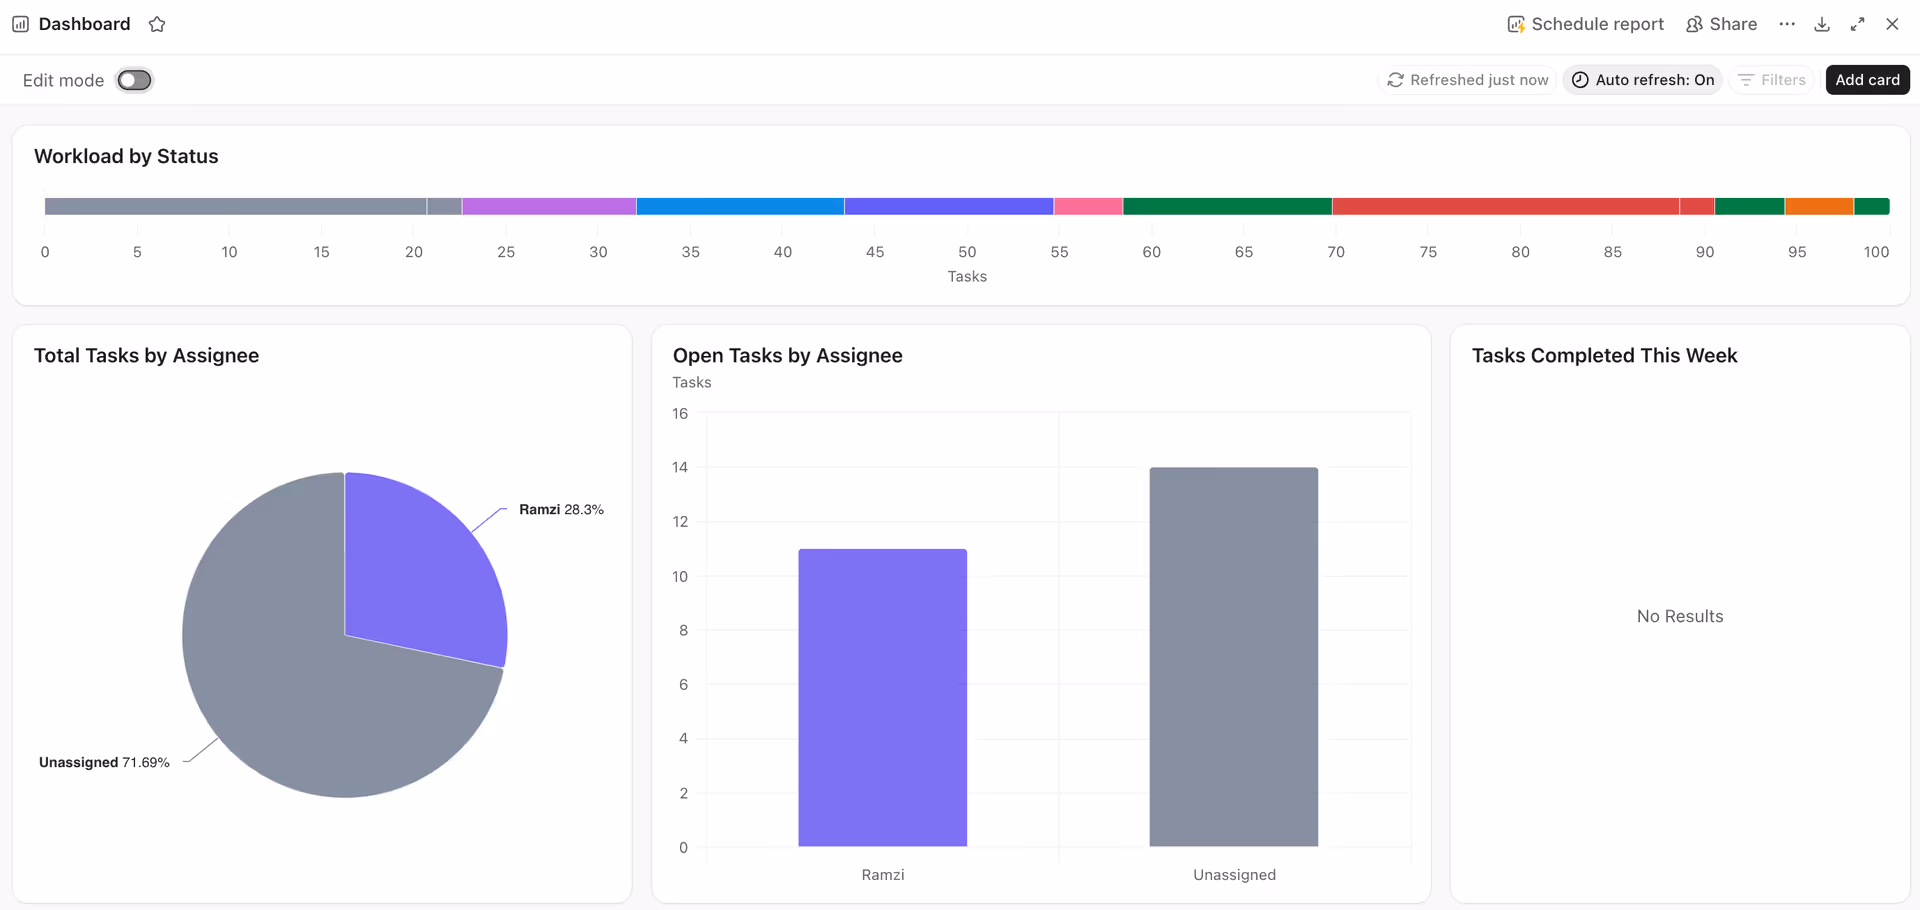
Dashboards
For small teams, start with the Overview feature. It provides the essential visibility without extra setup. Once your operations grow, transition to Dashboards for customized KPIs.
Using Timesheets
Timesheets record how much time each person logs on tasks during a week. Team members can start timers while working or manually add entries later. If you handle billing or hourly work, review submitted timesheets for accuracy. ClickUp now supports timesheet approvals, allowing managers to verify logged hours before closing the week.
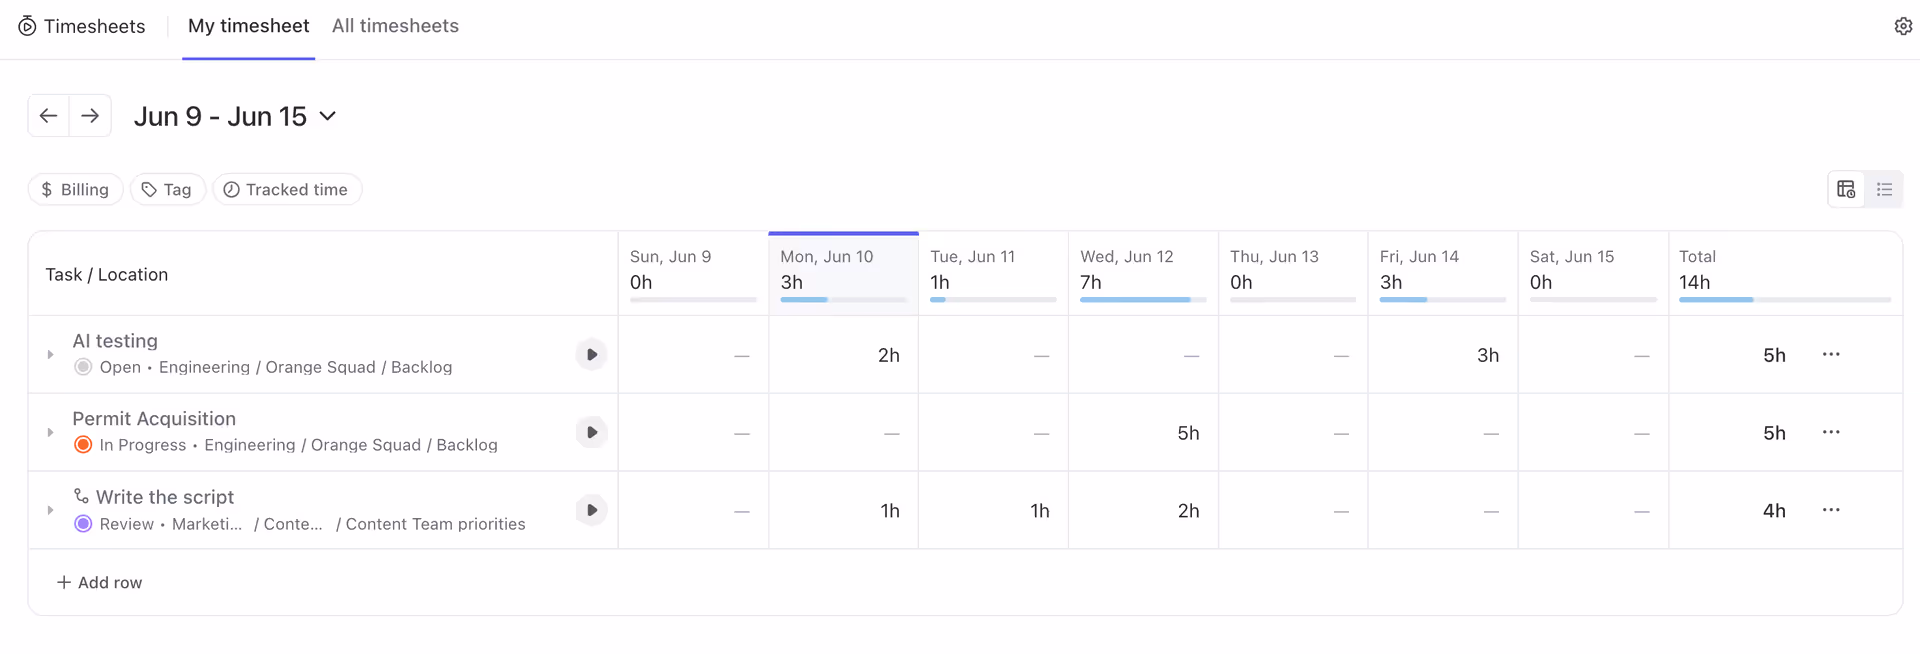
Timesheets hub
For deeper reporting, you can export timesheet data using tools like ClickUp to Sheets. This integration sends your data to Google Sheets for detailed analysis or invoicing. It’s helpful for agencies that charge by the hour or track billable utilization.
Choosing the Right ClickUp Plan for Your Needs
Selecting the appropriate plan is your first critical decision when setting up ClickUp. Let's break down the options. Check out the full article on ClickUp Plans here.
The Free Forever Plan: Ideal for Solo Use
The Free plan is designed for individuals or very small business owners who want to explore ClickUp's basic functionality. It's a great way to manage a personal project, organize a simple to-do list, or get a feel for the interface before committing financially.
This plan includes:
- Basic task management functionality
- Limited view options
- Simple to-do list features
- Restricted storage capacity
This tier works well for solopreneurs or small business owners who need basic project management tools or want to familiarize themselves with the platform before committing to a paid subscription.
The Unlimited Plan: The Best Value for Small Teams
For most small businesses, the Unlimited plan is the sweet spot. It provides the best value and unlocks the two features that make ClickUp truly powerful: Custom Fields and Automations.
- Custom Fields: These allow you to add specific data points to your tasks beyond the defaults. You can create fields for client phone numbers, budget amounts, project URLs, or anything else relevant to your work. This turns a simple task into a rich data record.
- Automations: This feature lets you create "if-this-then-that" rules to handle repetitive work. For example, you can automatically assign a team member when a task status changes to "In Progress" or post a comment when a due date arrives.
For small to medium-sized companies without specific compliance or security constraints, the Unlimited plan typically provides all necessary functionality at a reasonable price point.
The Business Plan: Advanced Team Management
The Business plan is for growing companies that need more control, specific methodologies, and deeper time management tools. This plan introduces several advanced features which includes:
- Google Single Sign-On (SSO) integration
- Sprint management for agile teams
- Advanced workload management views
- Comprehensive time tracking capabilities
This tier becomes necessary when your team needs structured agile processes or requires detailed capacity planning and time management.
The Enterprise Plan: For Security, Scale, and Support
Large organizations with strict security protocols will benefit from the Enterprise plan, which provides:
- Enhanced security options
- Customized contracts and terms
- A dedicated Customer Success Manager as your direct support contact
- Advanced permission controls
Most major corporations require the security features and support level included in this tier.
Managing Users
Members vs. Guests Explained
You can invite people from your main workspace settings menu. There are two primary roles you can assign:
- Members: These are typically your internal team members who need full access to the workspace. You pay a fee for each member seat you add to your plan. If you invite someone with the same email domain as your company (e.g., inviting john@mycompany.com to the mycompany.com workspace), ClickUp requires they be a member.
- Guests: These are external collaborators, such as clients, freelancers, or contractors. Guest seats are free, but they come with limitations. You can have up to five guests for every paid member on your plan.
The main difference lies in permissions. Guests cannot be invited to entire Spaces or added to Teams. Their access is restricted to the specific Folders, Lists, or Tasks you share with them.
Pulling It All Together
The true power of ClickUp comes from connecting and configuring all of these pieces - hierarchies, views, task features, apps, automations, fields, and permissions - to match your team's unique needs.
While it can seem complex at first glance, starting with the core concepts of Workspaces, Spaces, Lists, and Tasks establishes a scalable foundation.
With your structure in place, choose Views that provide helpful visual perspectives on your workflows. Dig into all the ways you can customize tasks using statuses, dependencies, and custom fields. Build conditional automations to handle repetitive actions. And use permissions to carefully control access and abilities.
The time investment required to learn ClickUp thoroughly pays immense dividends. Clicking all the pieces together based on your team's needs empowers you to manage work extremely efficiently.
The terminology and components covered in this guide provide a comprehensive overview of ClickUp's capabilities whether you're a beginner or a pro. Our hope is this gives you the confidence and clarity needed to derive maximum value.